Forty five or more years on and a Freelander and MX5 have ticked the first couple of boxes; OK it's not a Discovery and a Jag but sometimes you have to cut your cloth according to your means. In that same vein the final part of the dream trilogy is coming together, but it's no Winnebago or VDub, it's not even a Transit or a Traffic Master. My camper of choice is a VW Caddy Max- the van style that is, not the camper version. I looked at Transits and Renaults, believe me. I looked at every mark and model of classic VW camper by the dozen. Over the last 5 years whenever my end of month bank balance has been reached 4 figures I've run Youtube videos of custom and pro-build campers incessesantly. When it came to it though, the decision was a combination of factors I'd weighed up 1000 times already.
I don't need 4 berth, it's just me. I've never driven anything larger than a Freelander or Volvo estate, I really like the idea of stealth camping and the fuel saving of a small van over a Transit size van is stunning. Throw in ease of parking, car-priced ferry and toll road charges and a small van was a no brainer. 4 months of YouTube videos and checking out Auto Trader and eBay and my mind was set on a Transit Connect, a Transit Connet T230 to be exact. The one with the high roff and a few extra inches load length. My budget was £3000 all in and I'd discounted the VW Maxi as outside my budget by £500 - £1000. By February I was arranging to look at a couple of T230s and then the Caddy jumped off the screen. Within budget if I can keep conversion costs right down and in apparently decent condition all round. With a full 7ft 6 of load space it was bigger than the Connect, the twin sliding doors gave options and the split back doors were a bonus. The previous owner was a climber who'd part insulated the inside to use it for sleeping in so it had led a fairly quiet life for a van loved by builders and plumbers. A few enquiries about MOT, service history and condition and 2 days later it was making the 50 mile journey from South Yorkshire to a whole new life.
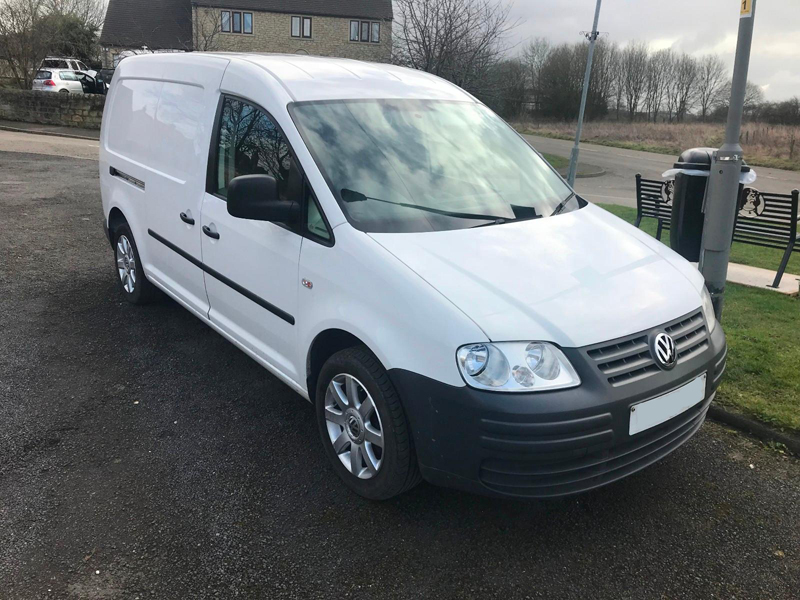
The advantages of the Caddy Maxi are primarily the extra load space over the competition and the impressive 60+mpg on a run up to the Lakes, but there's also a few little touches that add to the package - in this case a half width bulkhead and the initially unnoticed really deep shelf above the driver and passenger's head.The floor was a very well done job and the ceiling was insulated throughout with sheep wool. The walls, though, were a bit of a hotchpotch of roll mat cut offs, bits of sheep wool and largely pointless small pieces of plywood while the carpet had undoubtedly seen better days. Structurally and mechanically it was OK (just the one mid-cost repair so far), it was clean and there was a start I could build on.

At last the hours and hours of videos watching others convert an assortment of vans had an outlet. Where once I would have looked for quick ways of doing things the accumulated knowledge meant I actually understood why there were right and wrong ways to do things. I understood insulation; no more just something to keep the cold out but possibly the most important part of any conversion. With me in the back, cooking or just sleeping the air inside will be warm - or more importantly warm and MOIST. When warm, moist, air comes into contact with a cold surface the moisture condenses as water. Now I knew all this from camping but I hadn't taken the next jump. If I insulated the van but cut corners, or left gaps the moist air produced inside from breathing and cooking would condense on those gaps - and if they were then covered in plywood and trim the moisture would turn to rust and rust hidden from the eye until it found its way to the outside. With floor and ceiling checked and a bit of aluminium foil backed insulation added the walls came next. 3 inches of sheep wool held in place by foil insulation taped in place and topped with a single large sheet of double sided aluminium foil covered thermal barrier insulation. The foil was continued to cover all the exposed metal on the floor, walls or ceiling.


With the existing insulation and a spare roll that had been gathering dust since a laminate floor laying 9 years previously the cost to date was just a single roll of double sided foil but the next stage saw the first substantial expenditure. With a workshop cutting the ply lining may have been possible, but my workbench was a collection of upturned plastic boxes and my DIY abilities best described as "the person who can blow himself across the room just putting a shelf up" (screws and concealed mains cables don't get on well). Despite having floor and ceiling in place it worked out as cheap to buy a full ply lining kit, preshaped to fit, as it would to buy without a floor. The months of studying other people's builds, however, had taught me that there are areas you can get away with cheap and areas where investment should be prioritised and the ply lining was very much an area that deserved the best.
So far the conversion had gone well, but nothing goes flawlessly and I was about to make my first mistake! Armed with a roll of luxury trim I set to work on the bedroom floor applying trim to panels - and they looked stunning lined up along the hall as they dried.

What I'd forgotten, though, was the panels would need attaching to the van's walls by screws, and although well glued the trim was inevitably going to catch on the screws as they progressed through the plywood. The result was the stretch trim winding itself round the screw and preventing the screws reaching the metalwork that would anchor the wall panels while simultaneously deforming the previously smooth covering. The answer, not perfect but effective, was to slice an X in the trim with a Stanley knife and fold the trim back while drilling then folding it back and re-glueing once complete. IN hindsight it would probably have been better to attach the panels before applying the trim but hindsight's always a wonderful thing.

With the wall panels in place, finally, the wheel arch covers got the foil insulation treatment on the otside faces while the last of the sheepwool went on the inside. Now was also the time to fit the carpet. Thanks to a mix-up in deliveries that had seen the trim delivered 2 days late and to the wrong house the suppliers had kindly given a full refund for the inconvenience caused and the single carpet length, from a different supplier, had come in at just £20 and required minimal trimming thanks to the perfectly rectangular floor space. Filling the gaps along the edges of the panels and covering the remaining exposed insulation above the doors completed stage one and the inside was ready for the biggest transformation; accomodating a bed and units.